
오르막길
[React+OpenVidu]완전 초보자가 OpenVidu를 React로 만져본 기록 본문
webRTC(Web Real-Time Communication)
- 웹 브라우저가 서로 통신할 수 있도록 설계된 API
- 웹 브라우저 상에서는 어떠한 플러그인도 필요 없이 음성 채팅과 화상채팅, 데이터 교환까지도 가능하게 하는 기술
- WebRTC 기술은 P2P(Peer-to-Peer) 통신에 최적화
Kurento란?
- 전체 WebRTC 스택의 기능적 구현을 제공하는 미디어 서버
(미디어 서버 : 압축(인코딩)된 동영상 파일들이 미디어서버로 들어오면 해석(디코딩) 한 후 사용자(Client) 가 볼 수 있게 재포장(압축) 해서 사용자의 동영상 Player 형태에 맞게 보내주는 역할) - HTTP, RTP, WebRTC를 포함한 네트워크 스트리밍 프로토콜 등 다양한 기능 지원
openVidu란?
- kurento에 기반한 웹 또는 모바일 애플리케이션에서 화상 통화를 쉽게 사용 가능한 오픈 소스 플랫폼
- OpenVidu Browser : 클라이언트 측에서 사용할 라이브러리
- OpenVidu Server : 서버 측 내용 처리하는 어플리케이션
- 화상 통화에 집중해 프로세스를 단순화하여 개발자는 클라이언트 측 코드를 커스터마이징해 구현할 수 있음
- 즉, Kurento 라는 미디어 서버를 한번 더 래핑하여 사용자가 내부 구현을 몰라도 된다!
OpenVidu Docs
From here you can search these documents. Enter your search terms below.
docs.openvidu.io
왜 openvidu를 선택했는가?
직접 webRTC로 화상채팅을 구현한 팀들도 있었으나, 우리 팀은 화상채팅 외에도 다른 콘텐츠가 많았기때문에 최대한 빠르게 영상채팅 게임을 구현해야 했다.
그래서 비교적 단시간에 높은 퀄리티의 영상 채팅을 구현할 수 있는 openvidu의 힘을 빌리기로 했다.
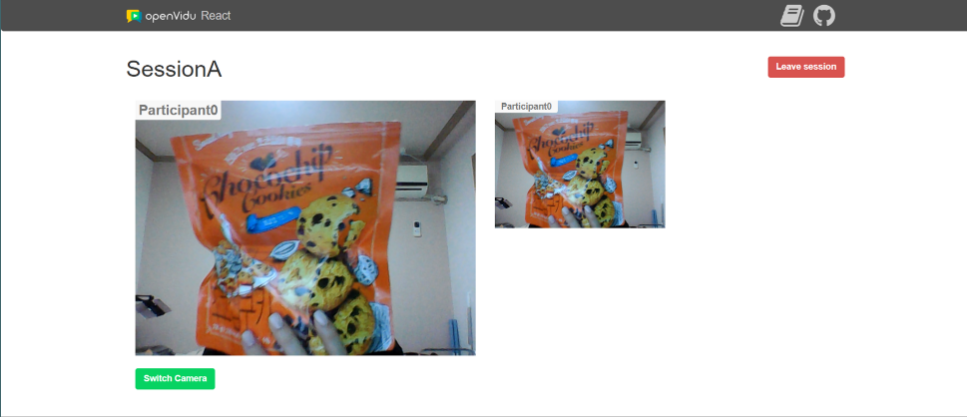
openVidu React을 실행해보자
openvidu-react - OpenVidu Docs
openvidu-react - OpenVidu Docs
From here you can search these documents. Enter your search terms below.
docs.openvidu.io
1️⃣ Run OpenVidu deployment
- 도커 설치가 먼저 진행되어야 한다!!
- powershell에 ~~docker run -p 4443:4443 --rm -e OPENVIDU_SECRET=MY_SECRET openvidu/openvidu-dev:2.25.0~~ 입력
- docker desktop에서 잘 돌아가고 있는지 확인
2️⃣ Run your preferred server application sample → node.js 버전을 사용했다
- git clone https://github.com/OpenVidu/openvidu-tutorials.git -b v2.25.0
- cd openvidu-tutorials/openvidu-basic-node
- npm install
- node index.js
- 백엔드 서버 구축 완료

3️⃣ Run the client application tutorial
- 2번과 다른 경로, 다른 bash에 openvidu-tutorials를 clone (같은 경로여도 되는 것 같다 나는 안해봄) https://github.com/OpenVidu/openvidu-tutorials
- cd openvidu-tutorials/openvidu-react
- npm install
- npm start
error: 0308010C:digital envelope routines::unsupported
⇒ 구글링 결과 버전에러로 추정. package.json의 script 부분을 "start": "react-scripts --openssl-legacy-provider start", 로 변경 - 튜토리얼 끝!!
openVidu React를 간단하게 이해해보자
- App.js: AppComponent , 앱의 주요 구성요소. 화상 통화에 참여하고 화상 통화 자체를 처리하는 기능이 포함되어 있습니다.
- UserVideoComponent.js: UserVideoComponent , 모든 사용자 비디오를 표시하는 데 사용됩니다. 사용자 이름인 OpenViduVideoComponent 하나를 포함하고 AppComponent 보기를 업데이트하기 위한 클릭 이벤트도 처리합니다 .
- OpenViduVideoComponent: 최종적으로 미디어 스트림을 표시하는 최종 HTML을 래핑하는 OpenViduVideoComponent 를 정의합니다.<video>
App.js 의 state
// These properties are in the state's component in order to re-render the HTML whenever their values change
this.state = {
    mySessionId: 'SessionA',
    myUserName: 'Participant' + Math.floor(Math.random() * 100),
    session: undefined,
    mainStreamManager: undefined, // Main video of the page. Will be the 'publisher' or one of the 'subscribers'
    publisher: undefined,
    subscribers: [],
};- OpenViduSessionobject 를 사용하면 바로 뒤에 선언되는 객체 를 얻을 수 있습니다.
- publisher자체 로컬 웹캠 스트림이 되고 subscribers배열은 화상 통화에서 다른 사용자의 활성 스트림을 저장합니다.
- mySessionId매개 myUserName변수는 잠시 후에 보게 되겠지만 화상 통화와 참가자의 닉네임을 나타냅니다.
Submit input을 클릭할 때마다 joinSession() 메서드 호출
- 먼저 OpenVidu 개체를 가져오고 상태에서 세션 속성을 초기화합니다.
- 관심 있는 세션 이벤트를 구독합니다.
- React 프레임워크를 사용하고 있으므로 원격 미디어 스트림을 관리하기 위한 좋은 접근 방식은 각 Subscriber개체에 공통 구성 요소를 공급하고 비디오를 관리하도록 하는 것입니다. => UserVideoComponent
- 이렇게 하려면 받은 각 새 구독자를 배열에 저장 subscribers하고 필요할 때마다 삭제된 모든 구독자를 제거해야 합니다.
- streamCreated()
- Session 개체가 수신한 각각의 새 Stream에 대해 구독하고 반환된 구독자 개체를 subscribers배열에 저장
- AppComponent 의 HTML 템플릿은 각 구독자에 대해 UserVideoComponent 를 선언하는 .map js 함수를 포함하므로 새 비디오를 표시
- 실제로 Subscriber객체로 공급하는 것이 아니라 부모 클래스로 공급 => StreamManager.
- 이렇게 하면 UserVideoComponentPublisher 를 재사용하여 객체(또한 StreamManager 클래스에서 상속됨)를 표시 할 수 있다.
- streamDestroyed()
- Session 개체에서 제거된 각 Stream에 대해(즉, 사용자가 화상 통화를 나갔다는 의미) 관련 Subscriber를 subscribers배열에서 제거하므로 React는 HTML에서 필요한 UserVideoComponent를 자동으로 삭제
- 각 Stream 개체에는 streamManager소유한 구독자 또는 게시자를 나타내는 속성이 있다(동일한 방식으로 각 StreamManager 개체에도 해당 Stream에 대한 참조가 있음).
- exception: 서버 측에서 예기치 않은 비동기 오류가 발생할 때 Session 개체에 의해 트리거되는 이벤트
OpenVidu 토큰 받기
액세스하려면 토큰이 필요하므로 서버 응용 프로그램 에 토큰을 요청, 그러면 서버 애플리케이션이 OpenVidu 배포에 대한 토큰을 요청
// --- 4) Connect to the session with a valid user token ---

// Get a token from the OpenVidu deployment
this.getToken().then((token) => {
    // See next point to see how to connect to the session using 'token'
}
애플리케이션 서버에서 최종적으로 토큰을 검색하는 역할을 하는 코드이다. 튜토리얼은 axios라이브러리를 사용하여 필요한 HTTP 요청을 수행
async getToken() {
    const sessionId = await this.createSession(this.state.mySessionId);
    return await this.createToken(sessionId);
}

async createSession(sessionId) {
    const response = await axios.post(APPLICATION_SERVER_URL + 'api/sessions', { customSessionId: sessionId }, {
        headers: { 'Content-Type': 'application/json', },
    });
    return response.data; // The sessionId
}

async createToken(sessionId) {
    const response = await axios.post(APPLICATION_SERVER_URL + 'api/sessions/' + sessionId + '/connections', {}, {
        headers: { 'Content-Type': 'application/json', },
    });
    return response.data; // The token
}
세션에 연결하고 웹캠 개시하기
// --- 4) Connect to the session with a valid user token ---

// Get a token from the OpenVidu deployment
this.getToken().then((token) => {
    // First param is the token got from the OpenVidu deployment. Second param can be retrieved by every user on event
    // 'streamCreated' (property Stream.connection.data), and will be appended to DOM as the user's nickname
    mySession.connect(token, { clientData: this.state.myUserName })
        .then(async () => {

            // --- 5) Get your own camera stream ---

            // Init a publisher passing undefined as targetElement (we don't want OpenVidu to insert a video
            // element: we will manage it on our own) and with the desired properties
            let publisher = await this.OV.initPublisherAsync(undefined, {
                audioSource: undefined, // The source of audio. If undefined default microphone
                videoSource: undefined, // The source of video. If undefined default webcam
                publishAudio: true, // Whether you want to start publishing with your audio unmuted or not
                publishVideo: true, // Whether you want to start publishing with your video enabled or not
                resolution: '640x480', // The resolution of your video
                frameRate: 30, // The frame rate of your video
                insertMode: 'APPEND', // How the video is inserted in the target element 'video-container'
                mirror: false, // Whether to mirror your local video or not
            });

            // --- 6) Publish your stream ---

            mySession.publish(publisher);

            // Obtain the current video device in use
            var devices = await this.OV.getDevices();
            var videoDevices = devices.filter(device => device.kind === 'videoinput');
            var currentVideoDeviceId = publisher.stream.getMediaStream().getVideoTracks()[0].getSettings().deviceId;
            var currentVideoDevice = videoDevices.find(device => device.deviceId === currentVideoDeviceId);

            // Set the main video in the page to display our webcam and store our Publisher
            this.setState({
                currentVideoDevice: currentVideoDevice,
                mainStreamManager: publisher,
                publisher: publisher,
            });
        })
        .catch((error) => {
            console.log('There was an error connecting to the session:', error.code, error.message);
        });
});- 방법이 성공하면 웹캠을 세션에 게시
- Publisher는 원하는 속성을 가진 객체를 가져와 메서드를 통해 세션에 게시 => Session.publish()
- 나머지 사용자는 Stream 개체를 받고 streamCreated이벤트를 실행
- 마지막으로 기본 비디오 플레이어(다른 UserVideoComponent )가 기본적으로 Publisher 개체를 표시
- 상태를 업데이트, 튜토리얼에서 사용자 카메라를 즉석에서 변경할 수 있으므로 현재 사용 중인 장치도 저장
- 그렇게 OpenVidu.getDevices한 다음 비디오 장치를 필터링한 다음 deviceId속성을 사용하여 현재 사용 중인 장치 찾기
- 현재 사용 중인 카메라를 this.state.currentVideoDevice및 게시자 개체를 this.state.publisher및 모두에 저장 this.state.mainStreamManager
- 이렇게 하면 웹캠이 표시되는 것과 정확히 동일한 방식으로 모든 원격 구독자를 따라 추가
세션 나가기
사용자가 세션을 떠나기를 원할 때마다 다음 session.disconnect에서 메서드를 호출하기만 하면 됩니다.
  leaveSession() {

    // --- 7) Leave the session by calling 'disconnect' method over the Session object ---

    const mySession = this.state.session;

    if (mySession) {
        mySession.disconnect();
    }

    // Empty all properties...
    this.OV = null;
    this.setState({
         mySessionId: 'SessionA',
        myUserName: 'Participant' + Math.floor(Math.random() * 100),
        session: undefined,
        mainStreamManager: undefined,
        publisher: undefined,
        subscribers: [],
    });
}'문제 해결하기 > FE' 카테고리의 다른 글
| [React] 리액트 jsx에서 외부 소스 이미지 엑박 오류 해결법 (0) | 2023.02.20 |
|---|---|
| [React] 자식이 부모에게 prop을 주는 방법? (0) | 2023.02.20 |
| [React] React에서 외부 스크립트 연결하기, 전역변수 (0) | 2023.02.06 |
| [CSS] SCSS, MUI, styled-component, emotion (0) | 2023.02.06 |